The Ultimate Guide to Creating a Successful Online Course in 2019
The dramatic growth of online learning
First, there was a prediction. In 2014, a market research firm predicted that online learning would become a $107 billion industry the following year. By 2016, it was clear that these predictions had come true and that the industry wasn’t slowing down.
The next estimate? Online learning would climb to become a $325 billion industry by 2025. That’s an annual growth rate of 10%!
Online learning encompasses a broad swath of activity, from schools and academia to self-paced classes users can complete at home. The latter pulls in about $46 billion of the total online learning industry. That’s a lot of numbers with a lot of zeros saying the same thing: online learning is a growing trend and it’s not going away. Consider that despite this sharply climbing growth, almost 75% of students around the world aren’t even aware of massive open online courses (MOOC), just one of many approaches to online learning.
It’s a growing market that still has room to grow. Why so big so fast? Online learning is the educational equivalent of a 24 hour buffet. Whether you’re a student pursuing a degree, a professional looking to sharpen skills, or someone who simply wants to learn to do new things, online learning has a format for you. In an information age, online learning is structured information amidst information overload. It’s information with purpose and value.

Breaking down the five most common fears of creating an online course
Creating an online course shouldn’t be terrifying, but for many, it’s a battle with imposter syndrome and the fear of a blank page staring back at them. Let’s take a look at the most common fears, and break the hold they might have on you.
Fear 1: Someone has already created a course on the same topic.
A little competition can be a great motivator for excellence, so let’s just put that out there. If that’s not enough to convince you, just know that there is more than one way to do something. There is more than one way to talk about something. Every single teachable topic or skill is multi-faceted. Because it is multi-faceted, we need multiple teachers to cover each of those facets. You bring something new to your course that sets it apart from the other similar topics:
- Your personality. People click with different personalities. We find some teachers easier to understand than others. Your personality is a huge factor, and is entirely unique.
- Your experience. No one has the same experience in life. We have different moments of gestalt. We have different stories about how we figured something out. We have come to different methods to reach the same conclusion. We have come to different conclusions using the same methods. Your experiences are different from others, and so what and how you teach will be likewise affected.
- Your approach. Two people with the same degree or certification will NOT do things the same way. You will have different work-arounds and techniques from someone else teaching the same topic.
We have hundreds of thousands of universities teaching the same class simultaneously, with students choosing based on the instructor. Each student is looking for something different in how a course is taught, even if it seems to cover the same material. There is definitely room for your course, because what you bring to it will be completely unique.
Fear 2: I’m not an expert, so I’m not qualified to create the course.
Let’s take imposter syndrome on full force. Impostor syndrome is basically that doubt you feel, a doubt that says all of your experience, personal accomplishments, training, understanding, awards, intuition, intelligence, and education still aren’t enough to make you qualified. You have an idea of what an expert in your field is, and it’s someone who is always higher and further from where you are. And worse? You’re terrified that someone else will see this and call you out for being an impostor. You feel like a fraud, and it’s keeping you from teaching others because surely people will know you don’t know. How can you keep this from holding you back and preventing you from creating an online course?
- Speak or list your fears. Write down the worst that could happen. Is it really so bad? Is there any comment or review someone might make that has ANY impact on your actual ability to do the thing you want to teach others to do?
- List your accomplishments, education, and experience. Be prepared to be surprised, if you do it honestly. If you’re passionate enough about something to want to teach others, chances are excellent that you have had more than enough experience and time spent perfecting your craft.
- Teaching is its own skill. There’s no rule that says only the best person can teach. Sometimes the most skilled or knowledgeable on a topic aren’t great at being able to explain it to others; sometimes, they don’t even want to share their secret knowledge. Again, if you have the desire to teach an online course, that’s a very good indicator that you should.
What makes an expert, anyway? A wall full of framed degrees? Two decades on the job? Website traffic? We like those kinds of things, because we can put a number on them. But it’s not always the best measurement. Expertise is a mix of knowledge, a desire and enough humility to continue to learn, an openness to change, a willingness to share what has worked for you, and an ability to figure things out on your own. It has very little to do with a position of power, even if others place value on that power or reputation. You are more than qualified to teach on a topic that you’re interested and involved in enough to want to share it with others. There are levels of expertise and levels of learners, and your course will be the perfect fit for someone.
Fear 3: I don’t have enough time to create an online course.
“How we spend our time tells us what is most important in our life.” That sort of seems condemning, but it does reveal that we often have more time than we think we do if we really look at how we’ve prioritized our activities. We make time for what we want to make time for, generally speaking. You have time to create an online course.
- Break down the process. Carry a small notebook or use a notes app on your phone, and start dumping ideas into it. Break down the process you’ll need to make the online course. It might have list items such as researching video equipment, outlining course material, research, gathering supplies — whatever is needed. You won’t know how much time it will take and whether it’s “too much” if you haven’t begun to estimate the process.
- Brain dump your thoughts. On the train, on break at work, at the coffee shop — wherever you are — you can start jotting random thoughts about what the class should cover and anything you definitely want to include. It doesn’t have to be in order. It doesn’t have to end up being used. Just get it out of your head. This frees up space for more ideas as well as helps ignite excitement because you start to realize you have a lot of great ideas to work with.
- Get false time restrictions out of your head. While it’s good to have a completion date goal, that goal doesn’t have to be tomorrow. Be honest about the time you have. If you only have a few hours a weekend, look at your plan and give yourself a few months based on the time available. Set aside the time it takes to do a good job with your online course. Then actually spend that time working on the course.
- Motivate yourself that it’s worth it. If you’re struggling to make time to finish that course, find a reason to motivate yourself to finish it. Find a reason to not binge a TV program and work on your online course instead. For example: A great online course can be a steady source of income. Does that motivate you? It should.
Would you like to get to the end of the year with several online courses earning you money, or the memory of hours of watching TV or taking naps? Your decision.
Fear 4: I am not tech savvy enough.
Not everyone is skilled at technology. That’s fair. For that reason, many online learning platforms have tried to level the playing field with tools and interfaces that make the barrier to entry fairly low. Workshop, for example, provides you with a Maker’s Guide, which covers the basics on everything from equipment to get to taking good photographs. It’s a great tool to help anyone get going. And not to get too far down the rabbit hole, but you can take online courses that teach you how to…create online courses! There’s a little secret about people who are good with technology: they weren’t always so good. You know how you get good at something? You just start, and you learn by doing. Trial and error are your friend. So maybe you don’t have it all perfected at first. Maybe you don’t have all the top gear right out of the gate. You start. You learn as you go. You get better. Do some basic research. Join an online forum for video or photography or course creation, and start reading. Read some Get Started guides. Then, get started.
Fear 5: What I want to teach is available online for free.
Pretty much everything is on the internet hundreds of times over. But how many shaky handheld phone YouTube videos do we have to watch where we can’t exactly make out what the person did? Even professionally made content put out freely by various brands have the problem of being sponsored by various products or an ulterior motive, such as brand building or selling products. In those cases, there is a trust issue for viewers. So yes, a person could pick up some knowledge from various blog posts and quick videos online, but they tend to lack something crucial that a great online learning course has: structured and cohesive information. An online course is orderly. It is structured. It might have multiple courses that build on each other to complete skills. It has an eye on teaching a person a skill instead of just showing a quick fix or handy tip. It helps students reach a measurable goal. Why else would people pay for something they could get for free?
- Paid courses are efficient and orderly. Paid content is usually on platforms meant for ease of use. It is in an orderly structure and format. It isn’t buried behind ads or collected in a mass of bookmarks in a browser. That saves people time, and time is worth money.
- Paid courses are found in one place. When people are paying for content, they only have to go to the one place. It’s habit forming, it’s time saving. We already established that that is worth the money.
- Paid courses are outcome-based. Free content is usually there to answer long-tail searches or very specific questions, with the content often being more about bringing in ad revenue that teaching the reader/viewer. Your paid course has a specific desired outcome: that the student would learn and remember. Online courses have an eye on the student. Free content has an eye on traffic.
- Paid courses have credibility. There is credibility and reassurance to paying for content. It indicates that the content creators have invested into what they’ve made, and there are promises backing it up.
- Paid courses are sticky. People grab at anything that’s free, but a paid course has the incentive to get them to actually finish. We have irrational responses to anything free, but we value (and usually finish) what we pay for.
Remember it this way: you could ask your friend how to bake cookies, or you could take several ordered online courses on how to improve your pastry chef skills. The two are very different. That’s why the online course you create stands a chance against what’s free online.
How to use data to select the perfect topic for your online course
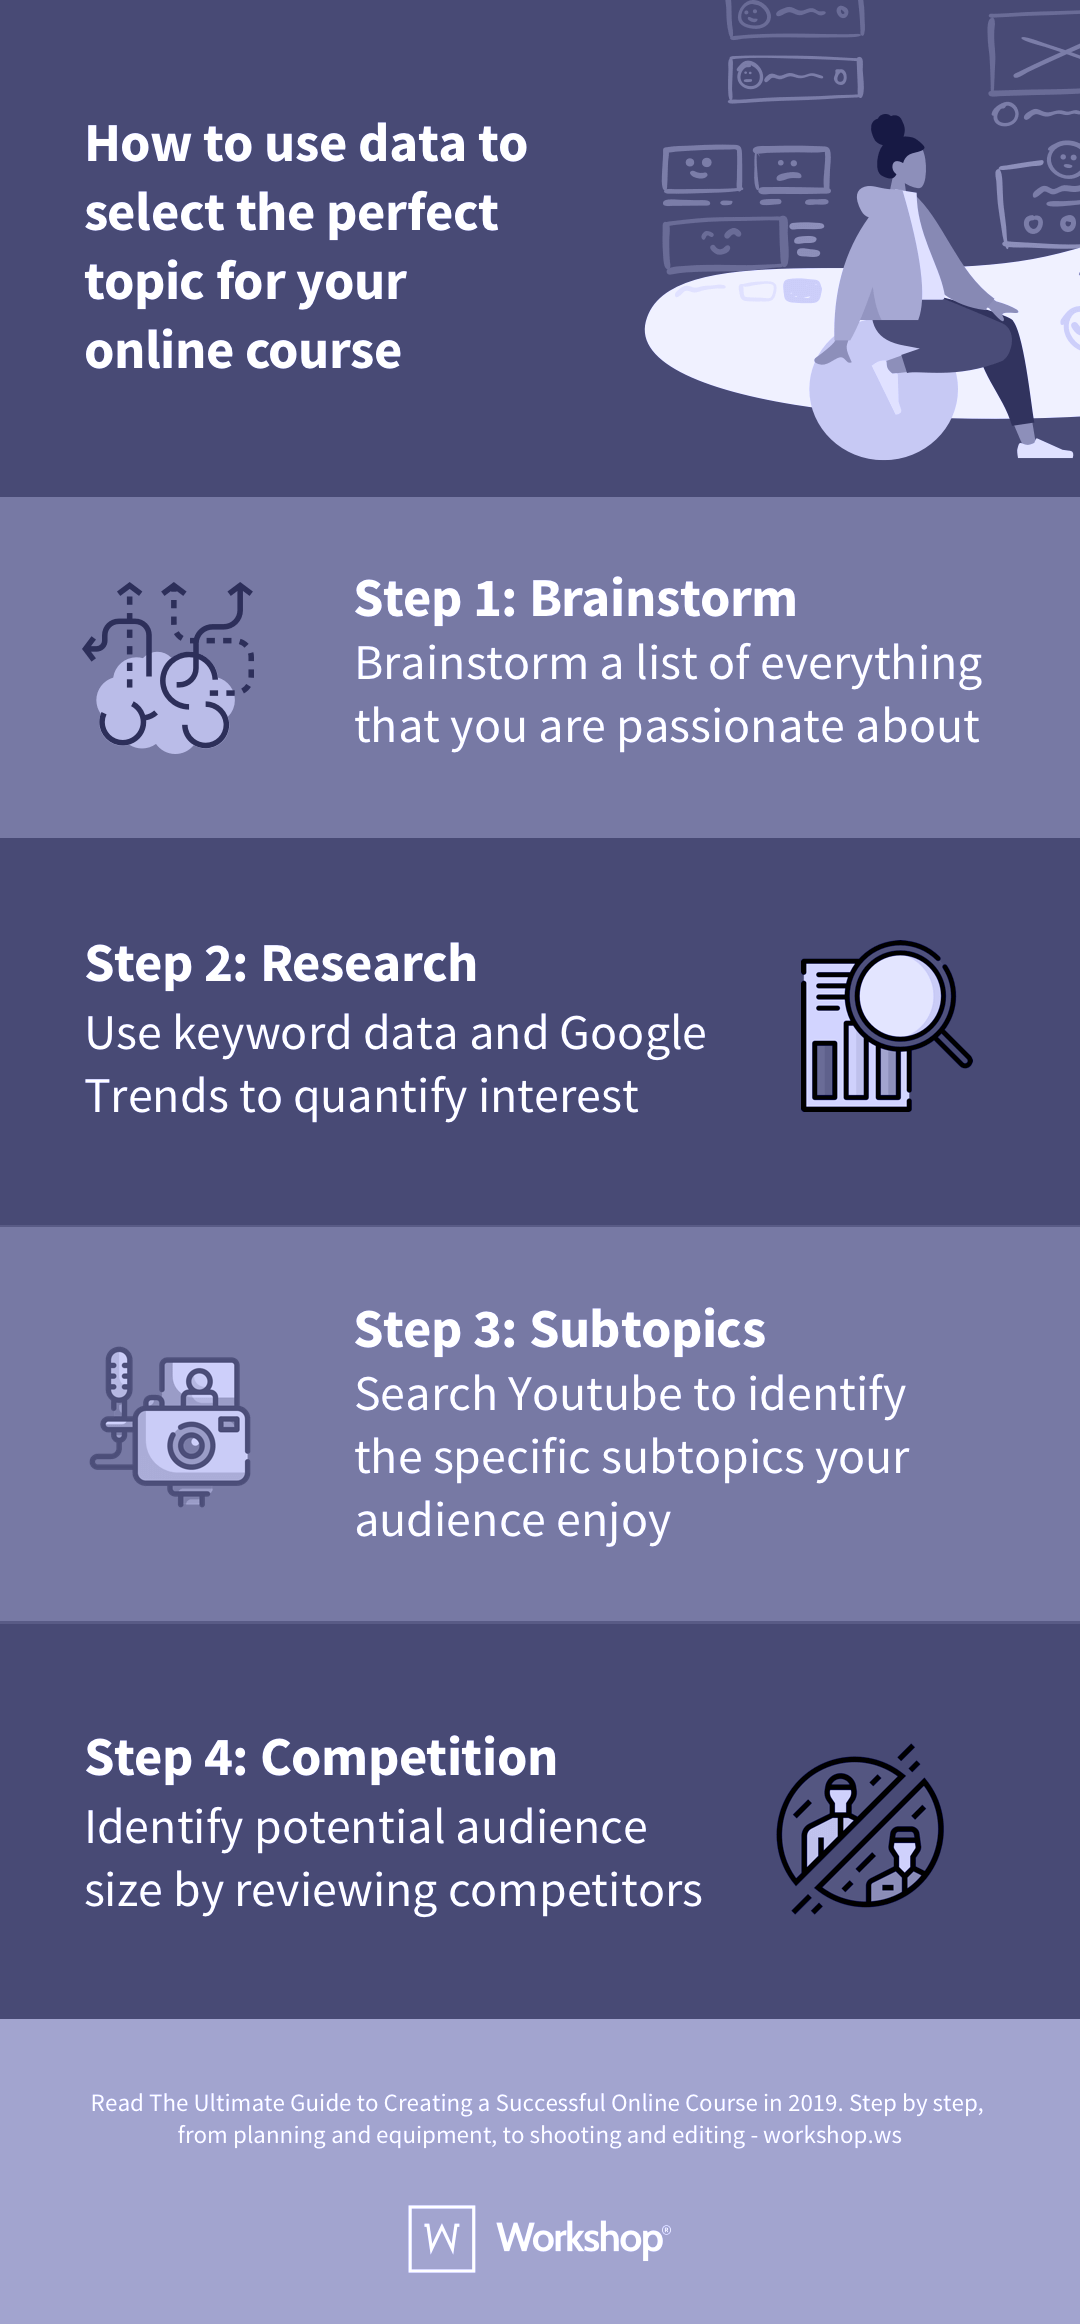
There is more than one way to decide what topic you’ll teach in your online course, but using data to help determine and refine the topic can serve you well in the long run. A simple four-question approach can help you maximize data for a successful online course.
What is your area of expertise?
You have to start with knowing what you know. Brainstorm a list of everything that you are passionate about, what interests you have, the experience and skills you’ve acquired — anything. Keep in mind this is not a social media or dating profile bio that you’re writing. This is not the time to list your love of long walks on the beach, but to really dig deep to consider the skills and knowledge you have that you take for granted and are barely aware of. Your list will probably look something like this:
- The obvious. This includes knowledge and experience based on your education or your past and current jobs. This is the kind of thing you put on LinkedIn or your CV. These tend to be over-arching and broad skills and topics. They might read more like job titles or educational degrees.
- The related and specific. Once you get the obvious things out of your head, you can start writing down skills and qualifications that they are made of. Think of it as breaking down a number into its primes, splitting the topic down to as small and specific as you can get.
- The hopes and dreams. These include all of the hobbies and interests you love to do that you maybe someday dream of doing as your full-time work. You’ll tend to find your most passionate topics here, because it’s where the “real world” loses its grip and you don’t contain your excitement.
- The questions people ask. You might even get some ideas on your areas of expertise from what people are often asking you to help them with. That’s an indicator that others see your expertise in the area, and that you have a knack for helping them.
Once you have these items listed, look for connections. Look for specific topics that could be brought together to form a larger class.
Is anyone interested in learning this topic?
There are two good ways to see if anyone is interested in learning the topic you’ve decided upon for your online course: keyword research and trends. Basically, it’s about finding what’s hot now and in the recent past, and what is trending towards popularity. That’s what we’re looking for. Keyword research helps you know what specific words people are using in search engines to find content. It’s a surprisingly good window into the questions people have in their heads and how they are thinking about a topic. Keyword research often involves a few tools and take some time, but Keywords Everywhere is an extension for Chrome or Firefox that simplifies the process. It removes a lot of the fuss usually found in doing keyword research, pulling in the “people also searched for” and “related” keyword information from Google, showing you the search volume metrics in the Google search page. It can also integrate with other sites with the same goal.

Which skills are the most sought-after within this topic?
Every topic can be broken down into the knowledge and skills that make up the larger whole. In some cases, specific skills or information are of more interest than the whole, and you might be better creating an online course around those specifics than a large course that covered everything. The latter takes time to create; if students only want a small part of your larger course, you may have wasted some of that time. This involves broad-to-narrow searching. Head over to YouTube. Start with broad queries. See what the results of those searches are. For example: “travel california.” Then start diving into the more specific long-tail searches where you enter larger phrases, or even ask full questions about individual parts of the larger topic. For example: “hiking in california parks” and then “hiking hidden areas of national parks in california.” Specific topics attract a specific audience, which is more likely to lead to students who sign up for your online class being students who truly want to learn what you have to teach.
If I wanted to learn this skill, what is currently available?
Put yourself in a prospective student’s shoes, and do some searching to find the online courses that are already available that cover what you intend to teach. Why? It gives you an idea of your potential audience size. It helps you understand what angle to take when teaching. It might help you spot a gap in what’s currently available so you know what information or skills you can teach that others are neglecting to include.
- Do some searches. Start on general search engines, and then search on online learning websites. Use the broad-to-narrow approach. Look for patterns of repetition (or blank spots) in what’s available.
- Use BuzzSumo to verify relevance. BuzzSumo helps you know what content is the most shared, what content is relevant to keywords, and which social networks the content is popular on. Find a popular blog that is related to what you want to teach, and see how its content fares on BuzzSumo. This helps you know how relevant your topic is.
In this way, the data can help you stand out from the competition simply by revealing areas of overlap and lack.

Validate your online course topic and maximise your chance of success with user personas
A user persona is a fictional person that is created to represent a typical user or customer. In your case, it would be a fictional student. Multiple user personas are helpful because they represent different segments of your potential student pool to help you understand who is using what you are creating, and how they want to use it.

- Understand your student’s motivations.
- Empathize with the struggles or roadblocks your students face.
- Know exactly what your students expect to get out of your course.
- Pick up on patterns of behavior your students might not even realize they display.
- Get outside of your head and what you want and need, and focus on creating what your potential students want.
Consider all of what we’ve talked about in regards to using data to decide what online course topic to pursue. This can be used to create user personas that are based on research and an understanding of your target audience. A good user persona has a name and a summary quote that defines their core motivation. It should also include a demographic profile (likely age, knowledge level, etc.), and an end goal that tells you what they ultimately hope to get out of your content. Including a scenario that shows how the person would behave in a situation can also be helpful. Once you have your personas created for the kinds of students you believe will be interested in your online class, you’ll refer to them as you build your class. You might “ask” them questions such as:
- Is this video easily understood by Gary, who is very new to the topic?
- Am I using tools or ingredients in my class that Bjork could afford?
- When Shannon completes my class, will she be able to confidently cook a four course dinner party for her colleagues?
As the class creator, it’s easy to get caught up in creating the class you would like, and easy to forget about the students who might be taking the class. Put some thought into creating your user personas, because they are the imaginary students you will be asking questions of as you create your course.
Pro tip: Use Facebook’s Audience Insights tool to create data-backed personas from 2.4bn users
- Log in to your Facebook Business Manager account.
- Click on the menu bar and under the heading ‘Plan’, select ‘Audience Insights’.
- You can now filter Facebook’s users by their Age, Location, Gender and even their interests to get a better idea of who your customer might be – a little creepy, huh?
- Try filtering ‘Interest’ by a related Facebook page – if your topic is cooking, you might look at one of the big cooking Facebook pages to see who their existing audience is.
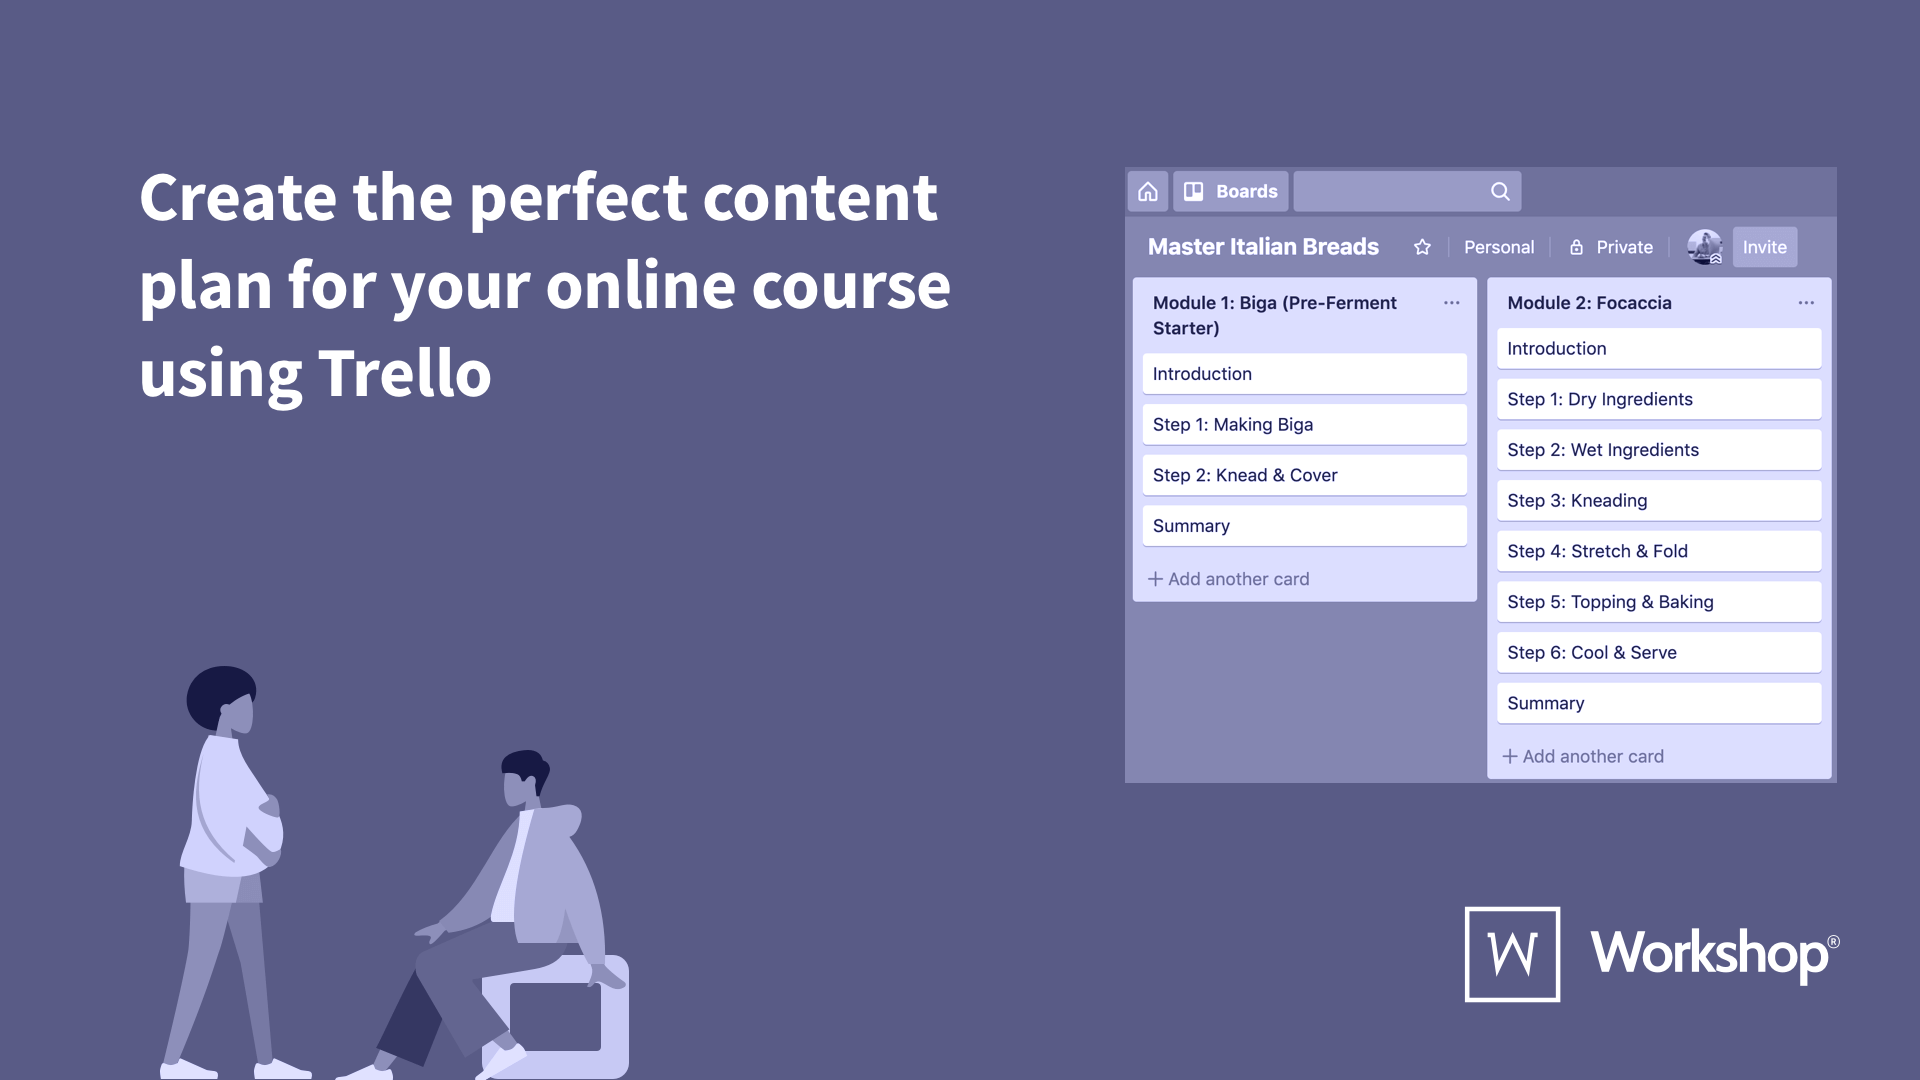
Create the perfect content plan for your online course
Trello is a popular collaborative project management system that uses a digital board-and-card system to organize items as they move through to completion. The board-and-card system has proven popular, so you may find similar approaches in other project management systems. Trello can easily be used to plan your online course.
1. Create a Trello board for your online course
Firstly, give your board a name. This could be the name of your course, so make it short, yet descriptive enough that your students will immediately understand if the topic piques their interest.
2. Create a list for each of your modules
Your course should have a clear learning path from start to finish, breaking down the overall learning goals into milestones that are achievable through practical, hands-on modules. In the course board, create a list for each of the main modules you’ve outlined. Each module should allow the learner to achieve one or more of your milestones through direct hands-on experience, combined with your guidance and explanation.
- Each module should leave the learner with a physical end-product (e.g. every module of a cake-making workshop may leave the leave the learner with another finished cake).
- Every module needs a compelling hook – the learner should be excited to do each module before they start.
- The first module should be particularly satisfying to break through the learner’s “I can’t do this” barrier (e.g. on a workshop about learning guitar, the first module could show them how memorising 3 simple chords gives them the ability to play dozens of songs).

3. Create a card for each step within a module
Within each module list, create a card for each step. Each module can consist of 6-9 steps that allows the user to learn something new through direct experience.
4. Create a checklist for each clip
Within each step card, create a checklist for each instruction within a step. Each step is a series of 3-6 clips that allow the user to follow the mentor’s actions and listen to their explanations in their own time.
Pro Tip: Organise clips into action-mode and selfie-mode
- Action-mode is when the camera is focused on the core subject matter of the module while you speak over your actions with simple instructions.


- Selfie-mode is when your camera is pointed at yourself in portrait orientation so that you can talk to the camera in a way that mimics the aesthetic of a face-to-face, one-to-one interaction.


- Due dates allow you to assign realistic deadlines to each step within a module.
- Labels are useful for categorising steps – for example: To-do, Next Priority, In-Progress, Complete.
- Attachments are a useful way to organise assets for your step.
- Comments can be a great way to communicate with colleagues if you’re working within a team.
By using Trello systematically, you can stay on track to finish your course on time. You also have a place to drop ideas, notes, lists, and team communication (if you aren’t working alone). Trello is extremely easy to use, and flexible enough to fit any kind of project or team.
Filming a professional quality course on a budget
You don’t have to teach with video, but you’re going to want to. In 2017, 74% of all internet traffic was video. This is an era of seeing to learn. Filming your online course can be as expensive as you want it to be. Since most of us can’t afford a $15,000 camera, we have to find ways to get a great result on a budget.
Filming Equipment: Workshop Maker’s Kit
If you’re new to filming and you’d like to ensure the best quality video you can film with your smartphone, we’ve put collated a Workshop Maker’s kit to help you out. This includes an adjustable phone stand, lighting and a microphone, which you can get ahold of by ordering them online. We’ve tested this kit, and it works!


Getting the set up right
Before filming can start, you’ll need to set up your equipment. This section assumes that you’re using basic filming equipment to film on a smartphone, like what’s listed in the Maker’s Kit. If you’re using different equipment, then we recommend you still try to apply the general tips laid out here and just make sure to shoot in a well-lit area, with high quality audio, in portrait orientation!
You cannot beat natural lighting
Use natural light as much as you can! Nothing beats natural light. If you can, try and film in an area with lots of natural light. You can always supplement natural light with additional lighting, which will help keep your clips looking consistent if you’re shooting throughout as the light changes.
Use additional lighting to help avoid shadows
If you will be relying primarily on lighting the room artificially, then it’s a good idea to have more than one light that you can position to make sure your filming area is well lit and you can avoid shadows. Something like the LED panel we listed in the Maker’s Kit would be perfect! If it’s dark outside then you can use your house lights for now, but it’s worth filming some more practice footage when it’s daylight to compare the quality of each. You’ll probably find that the daylight footage looks much better and so you may decide to film your actual workshop at a time when it’s light outside.
Mount your phone for stability
If you’re filming the workshop on your own, you can clip your phone mount to the edge of a flat surface or attach it to a tripod in a position that will show you performing actions for your workshop. The clips for your workshop should also be shot in portrait orientation. If you have the opportunity for someone to film for you, this can be a great way to get some different camera angles, and make it feel more natural to watch than a static shot. This is particularly good for action-mode shots.
Set up your microphone
If you’re using your phone, then just using your phones internal microphone might result in your clips sounding tinny or like they have a bit of an echo. Because of this, we recommend you use a clip-on mic or some other external microphone like the one listed in the Maker’s Kit. Setting up a clip-on microphone for phones:
- Run your microphone wire through the inside of your shirt and clip the microphone face-down near your chest.
- Plug the end of your microphone into your phone (using a headphone adaptor if necessary).
- Open up the voice memos app on your phone (or a recording app) and record a couple of test sentences to check that the microphone is set up correctly. You want to make sure that the microphone is placed so that it doesn’t rustle on your clothes and that it can clearly pick up everything you say.
Wireless Record Button
If you’d like to record and cut without running around to your phone, you can get ahold of a bluetooth button that you can hook up to your phone so that you can do this wirelessly. Video can have a steep learning curve. You’re dealing with framing, lighting, sound, sound/volume mixing, and editing. However, get started with what you have and can afford using basic sound and lighting concepts. You will learn as you go.
What are you waiting for?
Whether you’re a business looking to reach a wider audience, or an individual with an exciting skill to teach, an online course can be extremely rewarding and help inspire the next generation of professionals in your industry. At Workshop, we’re here to support you throughout the creation of your course with our Workshop Mentor mobile app and our extensive partner network. If you’d like to launch an online course on the Workshop marketplace and reach our global community of over 20,000 learners, get in touch today.